AEM Electronics Sensor Install in Honda B-Series
Over the past few decades, Honda’s B-series has been modified, pushed to its limits (and beyond), and repurposed more times than we can remember. And whether it’s the simple engine swap and street duty you’re after or the high-horsepower race build that has you daydreaming about bouncing off of that rev limiter, you can bet there’s an aftermarket solution available every step of the way.

One area that’s seen the greatest amount of progression since the early ’90s is engine management systems or, more importantly, affordable, user-friendly, and effective engine management systems. You can easily source plug-ins that give you base maps and enough adjustment to get your bolt-on engine setup running the way it should, along with full-blown standalone systems that give you complete control of every facet of your car’s heart. On that end, there’s AEM Electronics.
You’ve always known about AEM’s popular Series 1 and 2 EMS systems, but in recent years it’s their Infinity system that’s had everyone talking. Packed with advanced features usually reserved for systems that are far pricier, Infinity offers everything you need to properly oversee your build with plenty of room for add-ons later on.
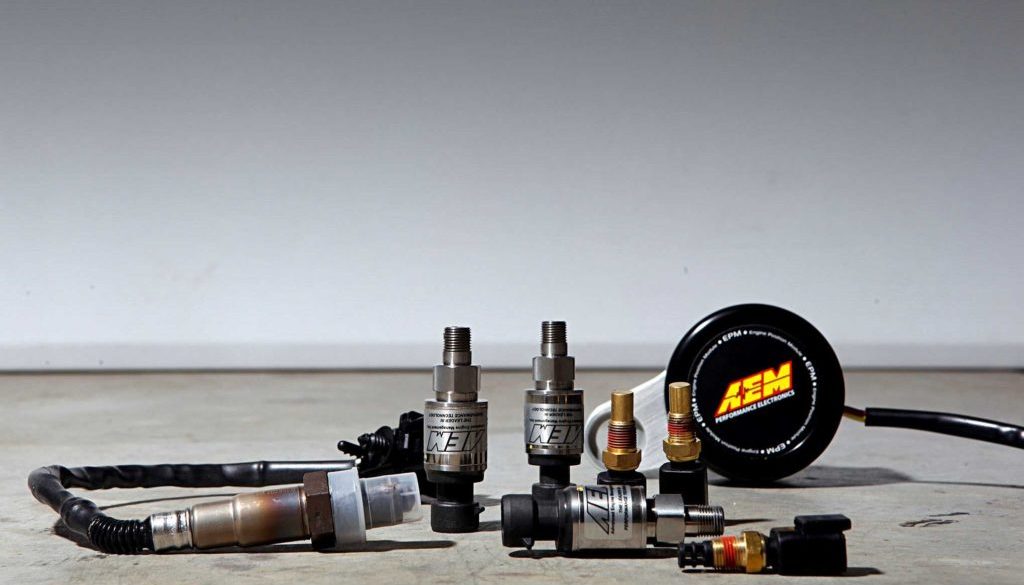
In prepping this particular B-series for Infinity, we’ve added a number of AEM sensors to help monitor vitals in the quickest, most precise way possible. What those sensors pick up will be relayed to Infinity and displayed in vibrant color via AEM’s CD digital dash display unit (CD-5 5-inch, and CD-7 7-inch displays). Here’s a look at the sensor and EPM used to start on the modernizing of this turbocharged B-series:
Oil and Water Temperature


In order to feed the Infinity oil and water temps, we picked up their brass 30-2013 Temperature Sensor Kit. For water temp, we pulled the sender that supplies temp info to the stock gauge cluster, and AEM’s 1/8-npt fitting almost fits perfectly, but because Honda uses a 1/8-bspt thread, a proper tap or an adapter is needed. We chose to tap it, and its compact design fits perfectly under the radiator’s braided hoses without any interference.


Oil temps can be pulled from a number of different sources, including the oil pan. Because we’re using a Golden Eagle oil filter adapter “sandwich plate” to feed the turbo filtered oil, there’s an unused -8AN port that was originally capped off and is now fitted with a -8 to 1/8-npt adapter. The depth of this port, with the adapter stacked on top, leaves plenty of room for the AEM’s temp prong to get solid, full-time monitoring.
Oil and Fuel Pressure


Pulling oil pressure with AEM’s 30-2130-150 is pretty simple with a B-series block. The factory pressure sender on most is right next to the oil filter location and uses the same 1/8-bspt threading that we saw on the water temp port, but rather than tapping this time, we picked up a bspt-to-npt adapter to attach the sensor.

The Aeromotive fuel pressure regulator we’re using features a 1/8-npt front port that you can add a gauge to, but since ours is already mounted to the end of the fuel rail and this opening was capped, we’re using it to pull a pressure number. A 90-degree fitting is utilized to clear the charge piping as it bends toward the manifold.

MAP sensors like the 30-2130-50 are typically run directly to the intake manifold by making a hole and tapping or, as is our case, using a pre-threaded hole provided by an aftermarket intake manifold. There it measures pressure in the manifold and relays a signal for the engine load to the management system. And while the sensor is threaded and ready to mount right to the plenum, this one will be remotely mounted and isolated to the firewall (once the rubber insert-equipped mounts arrive) with a line that runs to one of the supplied ports on the bottom of the manifold in order to avoid excessive vibration and any potential for a false signal.


To get a good reading of air temp, the 30-2014 required a little extra effort. AEM supplies a bung for the sensor so we stopped by Sportcar Motion to have it welded into place using some real estate on the underside of the charge piping, completely out of site.

An O2 sensor is an O2 sensor, right? Well, not really. Not only does the 30-2001 offer a more accurate AFR reading than just about anything readily available, it does so much quicker. How quick? Less than 100 milliseconds, and the unit’s heater element only takes about 20 seconds to warm up.


One of the most aggravating aspects of the B-series family is its ignition system. Now some have gone years without ever having a single issue with their factory distributor setup while others, like us, have been plagued by igniter failures and constant cap and rotor scrutiny. To avoid the frustration and further modernize our B, we decided to do a coil-on-plug conversion using OEM RSX coils and AEM’s 30-3255 electronic position module (EPM). Built to last, produced in 6061 T-6 billet aluminum, it fights off vibration with a shock-absorbing elastomer drive system.
To install the EPM, you’ll need to steal the retaining clip, pin, drive, and shims from your OEM B-series distributor. It’s a very simple swap, requiring only that you release the clip, collect the above-mentioned bits, and reinstall them onto the AEM unit, which takes less than 5 minutes. The small, slotted disc being held on with Downstar’s hardware swivels and allows this EPM to fit any B-, D-, or H-series engine type.


With the sensors mocked up, we began running a custom Rywire Motorsport Electronics engine harness throughout the engine bay to connect everything to make sure there were absolutely no clearance issues. The harness features only the essentials and gets rid of all of the factory bits that are no longer used on a build like this, and since we told Rywire which sensors we’d be using, the company set us up with an engine harness that is literally plug and play. Everything worked out well and with a final once-over, we removed the sensors, applied a healthy amount of sealant, and tightened them down for good.
Τhe article published on the superstreetonline site.


